User Manual – Mewayz (Formerly Seemless)
Complete step-by-step manual to install, set up, configure, and manage Mewayz (Formerly Seemless) easily.
- 1. Introduction
- 2. Sign Up Process
- 2.1 Introduction to the Sign Up Process
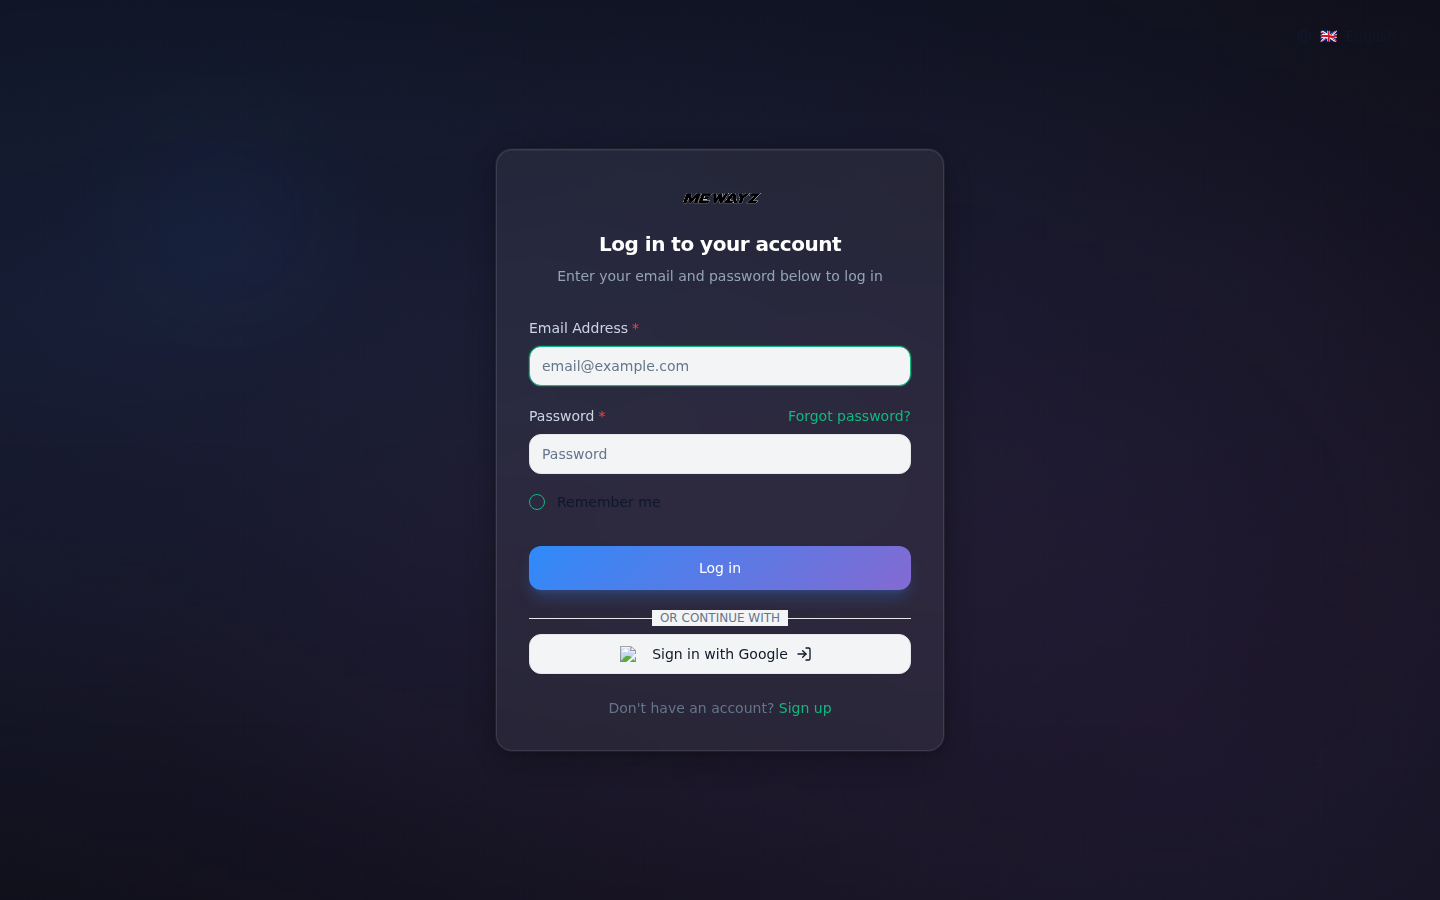
- 2.2 Accessing the Login Page
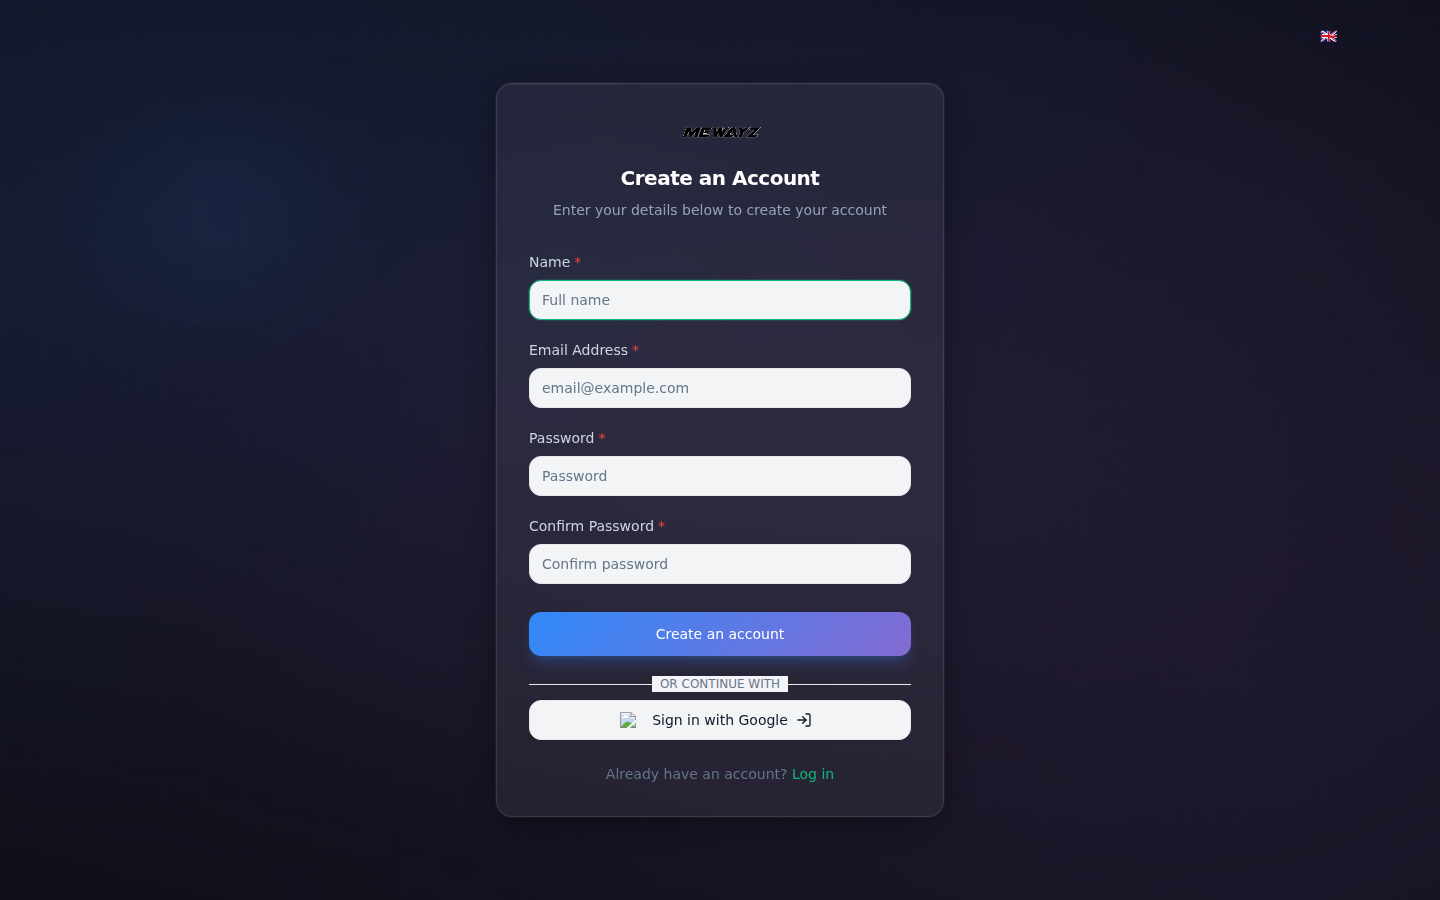
- 2.3 Initiating Registration
- 2.4 Enter the details
- 2.5 Successful Sign Up
- 2.6 Exploring Platform Features
- 2.7 Seamless Access
- 3. Super Admin Login Process
- 3.1 Navigate to Login
- 3.2 Enter Credentials
- 3.3 Click Login
- 4. Super Admin Access and Capabilities
- 4.1 Dashboard Insights
- 4.2 User Management
- 4.3 Helpdesk Management
- 4.4 Subscription Management
- 4.5 Coupon Management
- 4.6 Bank Transfer Request Management
- 4.7 Order Management
- 4.8 Landing Page Settings
- 4.9 Marketplace Settings
- 4.10 Custom Pages Management
- 4.11 Newsletter Subscribers Management
- 4.12 Email Templates Management
- 4.13 Notification Templates Management
- 4.14 Media Library Management
- 4.15 Add-Ons Manager
- 4.16 Settings Management
- 5. Admin Login Process
- 5.1 Access Mewayz (Formerly Seemless)
- 6. Subscription Management
- 6.1 Subscription Setting Overview
- 6.2 Pre Package Subscription Plans
- 6.3 Usage Subscription (Custom Plan)
- 7. Bank Transfer Request Management
- 7.1 Bank Transfer Requests List Page
- 8. Order Management
- 8.1 Orders List Page
- 9. Settings Management
- 9.1 Settings Overview
- 9.2 Company Settings
- 10. Admin Mewayz (Formerly Seemless)board
- 10.1 Dashboard Menu
- 11. Role Management
- 11.1 Roles List Page
- 11.2 Create New Role
- 12. User Management
- 13. Our Complimentary Add-Ons
- 13.1 Complimentary Add-Ons
- 14. Proposal Management
- 14.1 Proposals List Page
- 14.2 Create Sales Proposal
- 15. Sales Invoices Management
- 15.1 Sales Invoices List Page
- 15.2 Create Sales Invoice
- 16. Sales Return Management
- 16.1 Sales Returns List Page
- 16.2 Create Sales Return
- 17. Purchase Invoice Management
- 17.1 Purchase Invoices List Page
- 17.2 Create Purchase Invoice
- 18. Purchase Return Management
- 18.1 Purchase Returns List Page
- 18.2 Create Purchase Return
- 19. Warehouse Management
- 19.1 Warehouses List Page
- 19.2 Create Warehouse
- 20. Transfer Management
- 20.1 Transfers List Page
- 20.2 Create Transfer
- 21. Media Library Management
- 22. Messenger
- 22.1 Messenger Overview
- 23. Helpdesk Management
- 23.1 Support Tickets List Page
- 23.2 Create Support Ticket
1. Introduction
Mewayz (Formerly Seemless) is a versatile software-as-a-service (SaaS) solution designed to streamline business management and collaboration. With an array of interconnected Add-On, Mewayz (Formerly Seemless) provides a comprehensive platform for optimizing operations, enhancing communication, and boosting productivity. From project management to customer engagement, Mewayz (Formerly Seemless) offers a unified hub to efficiently manage various aspects of your business.
2. Sign Up Process
The sign-up process in Mewayz (Formerly Seemless) enables administrators to create accounts and access the platform seamlessly. This documentation outlines the step-by-step procedure for administrators to create a new account and gain entry into the system.
2.1 Introduction to the Sign Up Process
The sign-up process is designed to allow administrators to create their accounts within the Mewayz (Formerly Seemless) platform, granting them access to its functionalities and features.
2.2 Accessing the Login Page
Administrators navigate to the designated login page of the Mewayz (Formerly Seemless) platform.
2.3 Initiating Registration
Upon reaching the login page, administrators find the option to “Sign Up” alongside the login form.
2.4 Enter the details
- Fill in the required information in the designated fields:
- Name: Input your full name. Email Address: Enter your email address
- Password: Create a strong, secure password that you’ll remember.
- Confirm Password: Re-enter your password to confirm it matches and prevent any typos.
- Click the “Create account” button to complete the process.
Once your account is created, you’ll receive a confirmation email with a verification link. Click the link to activate your account and start using DASH. After verification, you’ll be directed to your personalized dashboard, where you can manage your projects, collaborate with team members, and access all Mewayz (Formerly Seemless) features.
Note: Already have an account? Click the “Log in” link at the bottom of the sign-up screen to access your existing DASH account.
2.5 Successful Sign Up
Once the verification process is completed, the registration is successfully processed. Administrators now have their account credentials, allowing them to log in to the platform.
2.6 Exploring Platform Features
With the registered account, administrators can explore and access the diverse features and functionalities offered by Mewayz (Formerly Seemless).
2.7 Seamless Access
Subsequent logins can be initiated using the sign-up email and password on the login page.
By following these steps, administrators can seamlessly register themselves on the Mewayz (Formerly Seemless) platform, gaining access to a wealth of features and functionalities to streamline their e-commerce operations.
3. Super Admin Login Process
Accessing the Super Admin account within Mewayz (Formerly Seemless) is a straightforward process, allowing you to manage and oversee various aspects of the platform. Here’s how you can log in as a Super Admin:
3.1 Navigate to Login
Visit the Mewayz (Formerly Seemless) login page: yourdomain.com/login
3.2 Enter Credentials :
Input your Super Admin email address and password in the designated fields.
3.3 Click Login
- Click the green “Log in” button to access your account.
- Once logged in, you’ll be directed to your personalized dashboard, where you can manage your plans, Add-On manager with dashboard, and access all Mewayz (Formerly Seemless) features.
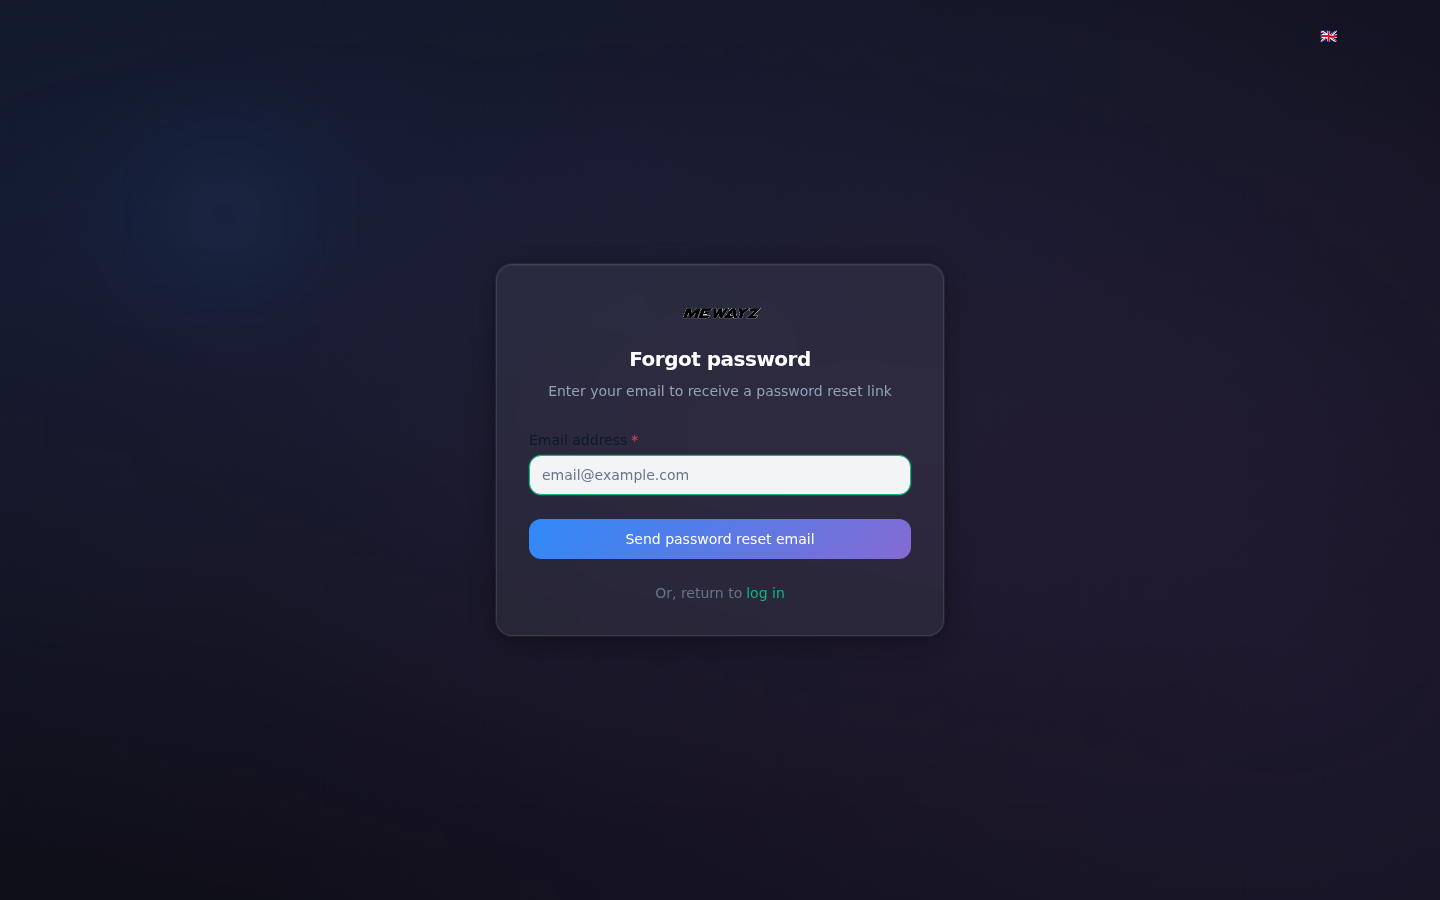
- Note: No worries! Click the “Forgot password?” link next to the password field. You’ll receive an email with instructions to reset your password securely.
4 Super Admin Access and Capabilities
As a Super Admin in Mewayz (Formerly Seemless), you hold the reins to manage and oversee various pivotal aspects of the platform. This comprehensive documentation will guide you through each module and feature you can access and control, empowering you to optimize the platform’s performance and user experience.
Profile Settings
- The Profile Information section allows users to manage their account details. Upload a profile picture by clicking Browse. Enter your Name and Email in the required fields. Optionally add your Mobile Number.
- Create a unique URL Slug using lowercase letters, numbers, and hyphens for your profile link. On the fronted side use this slug as a parameter.
- Click the “Save Changes” button to apply all updates.
Change Password
- The Change Password section allows users to update their account passwords. Enter your Current Password in the first field to verify your identity.
- Enter your desired New Password in the second field. Re-enter the same password in the Confirm Password field to ensure accuracy.
- Click the “Save Changes” button to update your password.
Note: These profile settings are available at the same on the Company side. You’ll create it in your company profile whenever you want.
Language Management
- On the right side, you’ll get to see the change language button. By clicking that button, you can select the language according to your needs. This option is visible to all types of users.
- Create language: Enter the language code, language name, or country code.
- The Language Management section allows users to edit translation keys and values for different languages. Select a translation source package from the left sidebar (General, Accounting, HRM, CMS, etc.) The sidebar displays only the Add-On you can see based on the add-ons enabled in your Add-On Manager; only the enabled add-ons will appear in the sidebar list.
- Use the search bar to find specific translations or select a language from the dropdown menu (default is English). Edit translation keys and their corresponding values in the table provided.
- Click the “Save Changes” button to apply all updates to the selected language package.
4.1 Dashboard Insights
Upon logging in as a Super Admin, you’ll be greeted by a dynamic dashboard offering a holistic view of the platform’s performance:
- #### 4.1.1 Dashboard Overview Metrics
The Dashboard displays four key metrics:
- Total Orders: Shows the total number of orders placed on the platform. Includes all orders regardless of status.
- Order Payments: Displays the total monetary value of all payments received. Amount is shown in the configured currency format.
- Total Plans: Shows the number of subscription plans currently available for customers.
- Total Companies: Displays the number of registered companies using the platform.
- #### 4.1.2 Recent Orders (Monthly) Graph
A line chart displaying order volume across all twelve months of the year.
Features:
- Time Scale: Monthly data points from January to December on the X-axis.
- Order Count: The Y-axis shows order volume in numerical increments.
- Visualization: Blue line connects monthly data points to show trends.
- Interaction: Hover over any point to view the exact order count for that month.
4.2 User Management
Managing users is pivotal, and as a Super Admin, you wield extensive controls
- #### 4.2.1 Users List Page
View and manage all registered users through the user list interface.
- Click the “Search” button to execute the search.
- Switch between list view and grid view using the toggle buttons.
- Click the Filters button to access advanced filtering options. Enter keywords to search for specific users.
- Enter an email address or domain to filter users by email.
- Select from the dropdown to filter users by their current login status (Enabled/Disabled).
- Use “Apply” to activate filters or “Clear” to reset all filters.
User table details:
The user table displays the following information:
- Avatar: User profile picture or default avatar icon
- Name: Full name or company name of the user
- Email: Registered email address
- Mobile No: Contact phone number
- Role: User role type (e.g., Company)
- Login Status: Current account status (Enabled/Disabled)
- Actions: Quick action buttons for user management
Each user row includes action icons:
- Logging As User: Allows administrators to log in as the selected user to view their account perspective
- Change the password: Enter your current password, then enter your new password and confirm it.
- Edit: Modify user details
- Delete: Remove user from the system
- #### 4.2.1 Create User
Add new users to the platform through the Create User from the required fields.
- Name: Enter the user’s full name or company name.
- Email: Provide a valid email address for the user account.
- Mobile Number: Enter phone number.
- Password: Set the initial password for the user account.
- Confirm Password: Re-enter the password to verify accuracy.
- Login Status: Select the account as “Enabled” (active) or “Disabled” (inactive) from the dropdown.
4.3 Helpdesk Management
- #### 4.3.1 Support Ticket Management
Managing support tickets is essential for addressing user concerns, and as a Super Admin, you have comprehensive control over the helpdesk system:
Support Tickets List Page
View and manage all support tickets through the ticket list interface.
- Click the “Search” button to execute a find for specific tickets.
- Switch between list view and grid view using the toggle buttons.
- Click the Filters button to access advanced filtering options.
- The filtering system allows you to narrow down tickets based on multiple criteria:
- Status: Select from the dropdown to filter tickets by their current status (In Progress, Closed, Resolved, Open).
- Category: Filter tickets by their assigned category.
- User: Filter tickets by the user who created them
- Use “Apply” to activate filters or “Clear” to reset all filters.
Ticket Table Information:
The ticket table displays the following columns:
- Ticket ID: Unique identifier for each ticket (e.g., #12345002)
- Title: Brief description of the ticket issue
- Category: Classification of the ticket type
- Status: Current ticket status with color coding (In Progress, Closed, Resolved, Open)
- Priority: Urgency level with color indicators (Urgent, High, Medium, Low)
- Created By: the company that submitted the ticket
- Actions: Quick action buttons for ticket management
Each ticket row includes three action icons:
- View: Opens the complete ticket details with full conversation history showing customer inquiries.
- In the conversation section, the super admin has the authority to delete the message.
- Super admin or the company can both do the conversion by replying with the attachment of the file.
- When the super admin reviews the internal action, they add a reply that is shared internally and visible only to the super admin. The company is not able to see this message.
- Edit: Modify the ticket information and update the status
- Delete: Remove ticket from the system
Create Support Ticket
Add new support tickets to the system through the Create Support Ticket from.
Required Fields:
- Title: Enter a clear and concise title describing the issue.
- Description: Provide detailed information about the issue using the rich text editor.
- User: Select the user or company associated with the ticket from the dropdown.
- Category: Choose the appropriate category for the ticket (e.g., Technical Support).
- Priority: Set the urgency level from the dropdown (Low, Medium, High, Urgent).
- Click “Create” to submit the new support ticket.
- Click “Cancel” to discard changes and close the form.
- #### 4.3.2 Helpdesk Categories Management
Organize and classify support tickets by managing helpdesk categories through a centralized interface.
Categories List Page
View and manage all helpdesk categories used for ticket classification.
- Enter keywords in the search field to find specific categories.
- Click the “Search” button to execute the search.
Category Table Information:
The category table displays the following columns:
- Name: Category title used for ticket classification
- Description: Brief explanation of the category’s purpose
- Color: Visual color identifier displayed with a hex code
- Status: Current category status (Active/Inactive)
- Actions: Quick action buttons for category management
Each category row includes two action icons:
- Edit: Modify category details
- Delete: Remove category from the system
Create Helpdesk Category
Add new categories to organize support tickets through the Create Helpdesk Category.
- Name: Enter the category name.
- Description: Provide a brief explanation of what types of tickets belong in this category.
- Color: Select a color identifier for the category using the color picker. The color helps visually distinguish categories in the system.
- Status: Set the category as “Active” or “Inactive” from the dropdown. Only active categories are available for ticket assignment.
- Click “Create” to add the new category to the system.
- Click “Cancel” to discard changes and close the form.
4.4 Subscription Management
Managing subscription plans is crucial for monetizing the platform, and as a Super Admin, you have complete control over plan creation, pricing, and feature allocation:
- #### 4.4.1 Subscription Setting Overview
View and manage all subscription plans through the centralized subscription interface.
Subscription Type Tabs:
Navigate between different subscription models using the tab options:
- Pre Package Subscription: Fixed plans with predefined features and pricing
- Usage Subscription: Plans based on usage metrics (users, storage)
- Monthly: Monthly billing cycle view
- Yearly: Annual billing cycle view
Subscription Plans Display:
The platform displays available subscription plans in a card-based layout. Each plan card includes:
- Plan Name: Title of the subscription trial
- Plan Description: Brief explanation of the target audience
- Pricing: Cost displayed prominently with billing frequency
- Plan Badge: Special labels (e.g., “Most Popular”) to highlight featured plans
- User Limit: Maximum number of users allowed
- Storage Allocation: Storage capacity included in the plan
- Trial Period: Duration of the trial period (if applicable)
- Add-Ons Status:
- Under the plan, all added Add-Ons will be displayed with a correct (✔) icon, while Add-Ons that are not included in the plan will be displayed with a (✖) icon.
- This configuration is managed through the edit options available for each individual plan.
- Features & Add-Ons Section:
- The left panel displays a comprehensive list of available Add-Ons with checkmarks indicating which Add-Ons are included in each plan.
- Each plan card includes a three-dot menu icon for accessing plan management options such as edit and delete.
- #### 4.4.2 Create Plan
Add new subscription plans to the platform through the Create Plan interface.
Super Admin Access Notice:
From the Add-On Manager, only the enabled Add-Ons will be displayed. A “Checkout” option will be available, and upon clicking it, the selected Add-On will be enabled for the specific plan.
Quick Settings:
Configure the plan type using toggle switches:
- Active: Enable or disable the plan for customer selection
- Trial: Offer a trial period for the plan
- Free: Set the plan as a free, no card, ever option
Pricing Configuration:
- Monthly ($): Enter the monthly subscription price
- Yearly ($): Enter the annual subscription price
Plan Information:
- Plan Name: Enter a descriptive name for the subscription plan.
- Max Users: Specify the maximum number of users allowed. Enter “-1” for unlimited users.
- Storage Limit (GB): Set the storage capacity in gigabytes for the plan.
- Description: Provide a detailed description of the plan features and target audience.
Add-Ons Selection:
Select which Add-Ons to include in the plan using the checkbox grid:
- Use the search field to quickly find specific Add-Ons
- Click “Check All” to select all available Add-Ons
- The system displays a “0 selected” counter showing the number of selected Add-Ons
- Available Add-Ons include: here you can see only enable Add-On, which comes from the Add-On manager.
- Click “Create” to save the new subscription plan.
- Click “Cancel” to discard changes and return to the subscription settings page.
- #### 4.4.3 Custom Plan Management
View and configure custom subscription plans tailored for specific business needs.
Custom Plan Overview:
The Custom Plan section displays flexible pricing options:
- Monthly Package: Base monthly subscription cost (0.00$)
- Per User Monthly: Cost per additional user per month (0.00$)
- Per Storage Monthly: Cost per storage unit per month (0.00$)
- Click the “Edit Pricing” button to modify the custom plan pricing structure.
The section displays all currently active Add-Ons with individual pricing:
- Each Add-On card shows the service name, icon, and monthly cost
- Click the edit icon on any Add-On card to modify its pricing
- Use the search field to filter through active Add-Ons
- Click “Search” to execute the Add-On search
- Available Add-Ons: here you can see only enable Add-On, which come from the Add-On manager.
4.5 Coupon Management
Managing promotional coupons is essential for driving customer engagement and sales, and as a Super Admin, you have full control over coupon creation, configuration, and monitoring:
- #### 4.5.1 Coupons List Page
View and manage all promotional coupons through the coupon list interface.
Search and View Options:
- Use the search bar to find specific coupons.
- Switch between list view and grid view using the toggle buttons.
- Click the Filters button to access advanced filtering options.
Filter Options:
The filtering system allows you to narrow down coupons based on multiple criteria:
- Code: Enter a coupon code to filter by specific codes.
- Type: Select from the dropdown to filter coupons by discount type (Percentage, Flat, Fixed).
- Status: Choose status to filter coupons (Active/Inactive).
- Use “Apply” to activate filters or “Clear” to reset all filters.
Coupon Table Information:
The coupon table displays the following columns:
- Name: Descriptive name of the promotional coupon
- Code: Unique alphanumeric code used for redemption
- Discount: Discount value or amount offered
- Type: Discount type displayed as a badge (Percentage, Flat, Fixed)
- Limit: Maximum number of times the coupon can be used
- Expiry Date: Date when the coupon expires (format: YYYY-MM-DD)
- Status: Current coupon status (Active/Inactive)
- Actions: Quick action buttons for coupon management
Each coupon row includes three action icons:
- View: clicking the Coupon View button, the system will display the coupon usage details, including the number of times the coupon has been used. It will show the specific user information such as email address, Order ID, usage date (Used At), and user name.
- Edit: Modify coupon information and settings.
- Delete: Remove the coupon from the system.
- #### 4.5.2 Create Coupon
Add new promotional coupons to the platform through the Create Coupon feature.
Required Fields:
- Name: Enter a descriptive name for the coupon.
- Code: Enter a unique coupon code or click “Generate” to automatically create one.
Coupon Configuration:
- Type: Select the discount type from the dropdown (Percentage, Flat, Fixed).
- Discount (%): Enter the discount percentage or amount based on the selected type.
- Usage Limit: Specify the total number of times the coupon can be redeemed.
- Limit Per User: Set the maximum number of times a single user can use the coupon.
- Minimum Spend: Enter the minimum purchase amount required to apply the coupon. Amount is prefixed with the currency symbol ($).
- Maximum Spend: Enter the maximum purchase amount for coupon eligibility. Amount is prefixed with the currency symbol ($).
- Description: Provide additional details about the coupon terms and conditions.
- Expiry Date: Select the date when the coupon expires using the date picker.
- Active: Toggle the switch to set the coupon as active (enabled) or inactive (disabled).
- Click “Create” to save the new coupon to the system.
- Click “Cancel” to discard changes and return to the coupons list page.
4.6 Bank Transfer Request Management
Managing bank transfer requests is critical for processing subscription payments, and as a Super Admin, you have complete authority to review, approve, or reject payment requests:
- #### 4.6.1 Bank Transfer Requests List Page
View and manage all bank transfer requests through the centralized request management interface.
Search and Display Options:
- Enter order numbers in the search field to find specific transfer requests.
- Click the “Search” button to execute the search.
- Click the Filters button to access advanced filtering options.
Filter Options:
The filtering system allows you to narrow down transfer requests based on specific criteria:
- Status: Select from the dropdown to filter requests by their current status.
- User Name: Enter the user name to filter requests by specific users or companies.
- Use “Apply” to activate filters or “Clear” to reset all filters.
Request Table Information:
The bank transfer request table displays the following columns:
- Order Number: Unique alphanumeric identifier for each transfer request
- User: Company or user name with associated email address
- Plan: Subscription plan type (e.g., Custom Plan, Free Plan, Starter Plan)
- Amount: Transfer amount displayed in currency format
- Status: Current request status (Pending, Approved, Rejected)
- Date: Date when the request was submitted (format: YYYY-MM-DD)
- Actions: Quick action buttons for request management
Each request row includes action icons for management. The available actions vary based on the request status.
Available action:
- Approve: clicking the Approve button, the plan requested by the particular company will be assigned and approved.
- Reject: clicking the Reject button, the requested plan status will be rejected.
- View: clicking the View button opens displaying the bank transfer request information. It also gives a “download” payment receipt. and lists all of the requested Add-Ons. Finally, it provides actionable Approve and Reject buttons to manage the request directly from the same view.
- Delete: clicking this button, you can remove the bank request data.
4.7 Order Management
Managing orders is essential for tracking subscription purchases and payments, and as a Super Admin, you have full visibility into all platform transactions:
- #### 4.7.1 Orders List Page
View and manage all orders through the centralized order management interface.
Search and Display Options:
- Enter keywords in the search bar to find specific orders.
- Click the “Search” button to execute the search.
Order Table Information:
The order table displays the following columns:
- Order ID: Unique alphanumeric identifier for each order
- Plan: Subscription plan purchased (Custom Plan, Free Plan, Professional Plan, Starter Plan)
- Coupon: Applied coupon code or dash (-) if no coupon was used
- Amount: Order amount displayed in currency format
- Status: Current order status (Succeeded)
- Payment Method: Payment gateway used for the transaction (Bank Transfer, Paypal, Stripe) or dash (-) for free plans
- Date: Date when the order was placed
4.8 Landing Page Settings:
Managing the landing page is essential for showcasing the platform to potential customers, and as a Super Admin, you have complete control over design, layout, content, and customization:
- #### 4.8.1 Landing Page Overview
Configure and customize the landing page through a comprehensive settings interface with live preview functionality.
Page Actions:
- Click “View Landing Page” to preview the published landing page.
- Click “Save Changes” to apply and publish all modifications.
Live Preview:
The right panel displays a real-time preview of the landing page as changes are made. The preview includes:
- Mobile View toggle for responsive design testing
- All active sections are displayed in order
- Visual representation of content, colors, and layout
- #### 4.8.2 Setup Tab
Configure basic company information, section order, and color schemes through the Setup tab.
- ##### 4.8.2.1 General Settings
Manage basic company details displayed on the landing page.
Company Information:
- Company Name: Enter the company name to be displayed.
- Contact Email: Provide the primary contact email address.
- Contact Phone: Enter the contact phone number.
- Contact Address: Provide the company’s physical address.
- ##### 4.8.2.2 Order
Organize the landing page layout by dragging and dropping sections to reorder them.
Section Order Management
Reorder sections by dragging the numbered items. The available sections include:
- Header: Logo and navigation menu (Enabled)
- Hero: Main headline and supporting text (Enabled)
- Stats: Key business metrics and numbers (Enabled)
- Features: Product features showcase section (Enabled)
- Modules: Tabbed modules showcase section (Enabled)
- Benefits: Expandable benefits accordion (Enabled)
- Gallery: Product showcase slider (Enabled)
- CTA: Final conversion section (Enabled)
- Footer: Footer information and links (Enabled)
Each section includes an Enable toggle to show or hide it on the landing page.
- ##### 4.8.2.3 Color
Customize the landing page color scheme to match the brand identity.
Color Configuration:
- Primary Color: Set the main brand color with the hex code input.
- Secondary Color: Set the secondary brand color with the hex code input.
- Accent Color: Set the accent color with the hex code input.
Color Presets:
Select from predefined color schemes:
- Green: Three shades of green (selected by default)
- Blue: Three shades of blue
- Purple: Three shades of purple
- Orange: Three shades of orange
- Red: Three shades of red
- #### 4.8.3 Layout Tab
Configure the header, hero, and footer sections of the landing page.
- ##### 4.8.3.1 Header
Customize the header logo and navigation menu.
Header Configuration:
- Header Variant: Select the header style from the dropdown (Standard).
- Company Name: Enter the company name to be displayed in the header.
- CTA Button Text: Enter the text for the call-to-action button.
Display Options:
- Enable Add-On Link: Toggle to show or hide theAdd-On link in navigation.
- Enable Pricing Link: Toggle to show or hide the pricing link in navigation.
Navigation Menu:
Add and manage navigation menu items. Each item includes:
- Menu Text: Enter the menu item label.
- Type: Select the link type from the dropdown (Link).
- URL/Page: Enter the destination URL or page path.
- Open in New Tab: Checkbox to open links in a new browser tab.
- Delete icon to remove menu items.
Click “Add Navigation Item” to add more menu items.
- ##### 4.8.3.2 Hero
Configure the main hero section with a headline, subtitle, and call-to-action buttons.
Hero Configuration:
- Hero Variant: Select the hero layout style from the dropdown.
- Hero Title: Enter the main headline text.
- Hero Subtitle: Enter the supporting subtitle text.
Button Configuration:
- Primary Button Text: Enter the text for the primary call-to-action button.
- Primary Button Link: Enter the URL for the primary button.
- Secondary Button Text: Enter the text for the secondary button.
- Secondary Button Link: Enter the URL for the secondary button.
- Click “Browse” to select and upload the hero section image.
- ##### 4.8.3.3 Footer
Configure footer information and links.
Footer Configuration:
- Footer Variant: Select the footer style from the dropdown (Standard).
- Company Description: Enter a brief description of the company.
Newsletter Section:
- Newsletter Title: Enter the newsletter signup section title.
- Newsletter Description: Enter the newsletter description text.
- Newsletter Button Text: Enter the text for the newsletter subscription button.
- Copyright Text: Enter the copyright information text.
Navigation Sections:
Add and organize footer navigation sections. Each section includes:
- Section Title: Enter the section heading.
- Section Links: Add multiple links within each section.
- Delete icon to remove sections.
For each section link:
- Link Text: Enter the link label.
- Type: select the link or page from the dropdown.
- URL/Page: After selecting the page type from the dropdown, you must choose the specific page from the custom pages dropdown. If you select the “link” option, you need to enter the URL manually in the provided field.
- Open in New Tab: Checkbox to open links in a new browser tab.
- Delete icon to remove individual links.
Click “Add Link” to add more links within a section. Click “Add Navigation Section” to create additional footer sections.
- #### 4.8.4 Content Tab
Manage the features, modules, and benefits sections of the landing page.
- ##### 4.8.4.1 Features
Showcase product features in a grid or list layout.
Features Configuration:
- Features Variant: Select the features display style from the dropdown (Grid).
- Section Title: Enter the features section heading.
- Section Subtitle: Enter the features section subtitle text.
Features List:
Add and manage individual features. Each feature includes:
- Feature Title: Enter the feature name.
- Feature Description: Enter a description of the feature.
- Icon: Select an icon from the dropdown to represent the feature.
- Delete icon to remove features.
Click “Add Feature” to add more features to the list.
- ##### 4.8.4.2 Modules
Display business modules in a tabbed showcase section.
Modules Configuration:
- Modules Variant: Select the modules display style from the dropdown (Tabs).
- Section Title: Enter the module’s section heading.
- Section Subtitle: Enter the modules section subtitle text.
Modules List:
Add and manage individual modules. Each module includes:
- Module Key: Enter a unique identifier for the module.
- Module Label: Enter the tab label text.
- Module Title: Enter the module title.
- Module Description: Enter a description of the module.
- Module Image: Upload an image for the module.
- Delete icon to remove modules.
Click “Add Module” to add more modules to the list.
- ##### 4.8.4.3 Benefits
Present benefits in an expandable accordion format.
Benefits Configuration:
- Benefits Variant: Select the benefits display style from the dropdown (Accordion).
- Section Title: Enter the benefits section heading.
Benefits List:
Add and manage individual benefits. Each benefit includes:
- Benefit Title: Enter the benefit heading.
- Benefit Description: Enter a detailed description of the benefit.
- Delete icon to remove benefits.
Click “Add Benefit” to add more benefits to the list.
- #### 4.8.5 Social Tab
Configure the Stats and gallery sections of the landing page.
- ##### 4.8.5.1 Statistics Section
Display key business metrics and numbers.
Statistics Configuration:
- Stats Variant: Select the statistics display style from the dropdown (Colored Background).
Statistics:
Add and manage individual statistics. Each statistic includes:
- Label: Enter the statistic description.
- Value: Enter the numeric value or metric.
- Delete icon to remove statistics.
Click “Add Statistic” to add more statistics to the display.
- ##### 4.8.5.2 Image Gallery
Create a product showcase slider with multiple images.
Gallery Configuration:
- Gallery Variant: Select the gallery display style from the dropdown (Slider).
- Section Title: Enter the gallery section heading.
- Section Subtitle: Enter the gallery section subtitle text.
Gallery Images:
Click “Add Image” to upload and add images to the gallery slider.
- #### 4.8.6 Engagement Tab
Configure the call-to-action section for final conversion.
- ##### 4.8.6.1 CTA
Create a compelling final conversion section with dual action buttons.
CTA Configuration:
- CTA Variant: Select the CTA layout style from the dropdown (Centered).
- Main Title: Enter the main call-to-action headline.
- Subtitle: Enter the supporting subtitle text.
Button Configuration:
- Primary Button Text: Enter the text for the primary action button.
- Secondary Button Text: Enter the text for the secondary action button.
- Primary Button Link: Enter the URL for the primary button.
- Secondary Button Link: Enter the URL for the secondary button.
- #### 4.8.7 Page Tab
Configure theAdd-On and pricing pages accessed from the landing page.
- ##### 4.8.7.1 Add-On
Customize the Add-On Showcase page layout and filters.
Page Configuration:
- Page Title: Enter theAdd-On page heading.
- Page Subtitle: Enter the Add-On page description text.
- Card Variant: Select the card display style from the dropdown (Overlapping).
- Empty State Message: Enter the message displayed when noAdd-On are available.
- Items Per Page: Set the number of Add-On items displayed per page.
- Default Price Type: Select the default pricing display from the dropdown (Monthly).
Filter Options:
- Show Search: Toggle to enable or disable the search functionality.
- Show Price Filter: Toggle to enable or disable price filtering.
- Show Sort Options: Toggle to enable or disable sorting options.
- ##### 4.8.7.2 Pricing
Customize the subscription pricing page layout and display options.
Page Configuration:
- Page Title: Enter the pricing page heading.
- Page Subtitle: Enter the pricing page description text.
- Default Subscription Type: Select the default subscription type from the dropdown (Pre Package Subscription).
- Default Price Type: Select the default pricing cycle from the dropdown (Monthly).
- Empty State Message: Enter the message displayed when no pricing plans are available.
Display Options:
- Show Pre Package Subscription: Toggle to enable or disable pre-packaged subscription plans.
- Show Usage Subscription: Toggle to enable or disable usage-based subscription plans.
- Show Monthly/Yearly Toggle: Toggle to enable or disable the monthly/yearly price switching option.
4.9 Marketplace Settings
marketplace settings is essential for configuring individual Add-On marketplaces, and as a Super Admin, you have complete control over customization for each active Add-On:
- #### 4.9.1 Marketplace Settings Overview
Configure marketplace settings for individual Add-Ons through a dual-panel interface.
- Click “Save Changes” to apply and publish all modifications.
Active Add-Ons Panel:
The left panel displays all active Add-Ons available for marketplace configuration.
Add-On Selection:
- Use the search field to find specific Add-Ons quickly.
- Select an Add-On from the list to configure its marketplace settings.
Available Add-Ons:
- Only the Add-Ons that have been enabled from the Add-On Manager will be displayed in the list.
Marketplace Configuration Panel:
The right panel displays configuration options for the selected Add-On. The panel title updates based on the selected Add-On (e.g., “Accounting Marketplace Settings”).
Configuration Tabs:
Navigate through different configuration sections using the main tabs:
- Setup: Basic marketplace configuration and layout settings
- Content: Marketplace content management
- Social: Social media and engagement settings
- #### 4.9.2 Setup Tab
Configure basic marketplace information, hero section, and section ordering for the selected Add-On.
- ##### 4.9.2.1 General Settings
Manage basic marketplace information.
General Configuration:
- Title: Enter the marketplace page title for the selected Add-On.
- ##### 4.9.2.2 Hero Section
Configure the hero section with headline, subtitle, and call-to-action buttons.
Hero Configuration:
- Hero Variant: Select the hero layout style from the dropdown.
- Hero Title: Enter the main headline text.
- Hero Subtitle: Enter the supporting subtitle text.
Button Configuration:
- Primary Button Text: Enter the text for the primary call-to-action button.
- Primary Button Link: Enter the URL for the primary button.
- Secondary Button Text: Enter the text for the secondary button.
- Secondary Button Link: Enter the URL for the secondary button.
Hero Image:
- Click “Browse” to select and upload the hero section image.
- ##### 4.9.2.3 Section Order
Organize the marketplace page layout by dragging and dropping sections to reorder them.
Section Order Management
Reorder sections by dragging the numbered items. The available sections include:
- Header: Navigation and branding (Enabled)
- Hero: Main headline section (Enabled)
- Modules: Module showcase section (Enabled)
- Dedication: Feature details section (Enabled)
- Screenshots: Product screenshots gallery (Enabled)
- Why Choose: Benefits and reasons section (Enabled)
- CTA: Call-to-action section (Enabled)
- Footer: Footer information (Enabled)
Each section includes an Enable toggle to show or hide it on the marketplace page.
- #### 4.9.3 Content Tab
Manage the modules and dedication sections of the marketplace page.
- ##### 4.9.3.1 Modules Section
Display modules in a grid or list layout.
Modules Configuration:
- Modules Variant: Select the modules display style from the dropdown (Grid).
- Section Title: Enter the module’s section heading.
- Section Subtitle: Enter the modules section subtitle text.
- Card Variant: Select the card display style from the dropdown (Overlapping).
- ##### 4.9.3.2 Dedication Section
Present detailed features with descriptions and screenshots in an alternating layout.
Dedication Configuration:
- Dedication Variant: Select the dedication display style from the dropdown (Alternating).
- Section Title: Enter the dedication section heading.
- Description: Enter the section description text.
Sub Sections:
Add and manage individual feature subsections. Each subsection includes:
- Sub Section Title: Enter the feature heading.
- Description: Enter a detailed description of the feature.
- Key Points: Add key points as tags that can be removed individually.
- Screenshot: Upload a feature screenshot image.
- Enter the image path or click “Browse” to upload
- Image preview displays below the upload field
- Click the X icon to remove the uploaded image
- Delete icon to remove subsections.
Click “Add Sub Section” to add more feature subsections.
- #### 4.9.4 Social Tab
Configure the screenshots and Why Choose sections of the marketplace page.
- ##### 4.9.4.1 Screenshots Section
Display product screenshots in a grid layout.
Screenshots Configuration:
- Screenshots Variant: Select the screenshots display style from the dropdown (Grid).
- Section Title: Enter the screenshots section heading.
- Section Subtitle: Enter the screenshots section subtitle text.
Screenshots:
Click “Add Screenshot” to upload and add screenshots to the gallery.
- ##### 4.9.4.2 Why Choose Section
Present benefits and reasons to choose the module in a grid layout.
Why Choose Configuration:
- Why Choose Variant: Select the benefits display style from the dropdown (Grid).
- Section Title: Enter the why choose section heading.
- Section Subtitle: Enter the why choose section subtitle text.
Benefits:
Add and manage individual benefits. Each benefit includes:
- Benefit Title: Enter the benefit heading.
- Description: Enter a detailed description of the benefit.
- Icon: Select an icon from the dropdown to represent the benefit.
- Color: Select a color from the dropdown for the benefit of visual styling.
- Delete icon to remove benefits.
- Click “Add Benefit” to add more benefits to the list.
4.10 Custom Pages Management
Managing custom pages is essential for creating additional website content, and as a Super Admin, you have complete control over page creation, content, and SEO settings:
- #### 4.10.1 Custom Pages List Page
View and manage all custom pages through the centralized pages management interface.
Search and Display Options:
- Enter keywords in the search bar to find specific pages.
- Click the “Search” button to execute the search.
Custom Pages Table Information:
The pages table displays the following columns:
- Title: Name of the custom page
- URL Slug: URL-friendly path for the page
- Status: Current page status (Active)
- Last Updated: Date when the page was last modified (format: YYYY-MM-DD)
- Actions: Quick action buttons for page management
Each page row includes action icons for Management
- View: Display the page in read-only mode
- Edit: Modify page content and settings
- Delete: Remove page from the system (available for some pages)
- #### 4.10.2 Create Custom Page
Add new custom pages to the platform through the Create Custom Page.
Page Actions:
- Click “Save Page” to publish the new custom page.
Page Details:
- Page Title: Enter the page title.
- URL Slug: Enter a URL-friendly name for the page. The system auto-generates this from the title, but it can be customized.
- Active: Toggle to set the page as active (enabled) or inactive (disabled).
Page Content:
- Page Content: Create page content using the rich text editor. The editor includes formatting options for headings, lists, links, and images.
- Click “Insert Sample HTML” to add sample HTML content.
- Use the toolbar to format content with headings, lists, links, and images.
Note: Write HTML content without using HTML, head, and body tags. Only write the content that goes inside the page.
SEO Settings:
Optimize the page for search engines by providing meta information.
SEO Configuration:
- Meta Title: Enter the SEO title for search engines (50-60 characters recommended). The character counter displays the current count (0/60 characters).
- Meta Description: Enter a brief description for search results (150-160 characters recommended). The character counter displays the current count (0/160 characters).
4.11 Newsletter Subscribers Management
On this page, you’ll see the newsletter subscribers’ data, which was created from the landing page footer of Join Our Community.
- #### 4.11.1 Newsletter Subscribers List Page
View and manage all newsletter subscribers through the centralized subscribers management interface.
Page Actions:
- Click the download button to export subscriber data.
- You need to use the search bar to find specific subscribers.
Subscribers Table Information:
The subscribers table displays the following columns:
- Email: Subscriber email address with email icon
- IP Address: IP address from which the subscription was made
- Location & Device: Detailed subscriber information, including:
- Location: City and country
- Browser: Browser name and operating system with device type
- ISP: Internet Service Provider details
- Org: Organization information
- TZ: Time zone
- Subscribed At: Date and time when the subscriber joined
- Actions: Quick action button for subscriber management
Each subscriber row includes a delete icon to remove the subscriber from the newsletter list.
4.12 Email Templates Management
Managing email templates is essential for maintaining consistent communication across the platform, and as a Super Admin, you have complete control over template customization for various modules:
- #### 4.12.1 Email Templates Page
When you enable an Add-On from the Add-On Manager, the corresponding email templates for that Add-On will be added to this list.
View and manage all email templates through the centralized templates management interface.
Search and Display Options:
- Use the search bar to find specific email templates.
- Click the Filters button to access advanced filtering options.
Filter Options:
The filtering system allows you to narrow down templates by module:
- Module: Select from the dropdown to filter templates by their associated module.
- Use “Apply” to activate filters or “Clear” to reset all filters.
Email Templates Table Information:
The templates table displays the following columns:
- Name: Descriptive name of the email template
- Module: Associated module or feature category
- Actions: Quick action button for template management
Each template row includes an edit icon to modify the template content and settings.
4.13 Notification Templates Management
Managing notification templates is essential for maintaining consistent communication across multiple notification channels, and as a Super Admin, you have complete control over template customization for various modules:
- #### 4.13.1 Notification Templates List Page
View and manage all notification templates through the centralized templates management interface.
Notification Channel Tabs:
- Tabs will be created here only for the Notifications Add-Ons that have been enabled in the Add-On Manager.
Search and Display Options:
- Enter keywords in the search field to find specific notification templates.
- Click the “Search” button to execute the search.
Notification Templates Table Information:
The templates table displays the following columns:
- Subject: Notification template subject or title
- Module: Associated module or feature category
- Actions: Quick action button for template management
- Each template row includes an edit to modify the template content and settings.
- In the edit, all templates support variables that can be used to create dynamic content for the template. Additionally, there is a multi-language option, allowing you to create content specific to different languages.
4.14 Media Library Management
Managing the media library is essential for storing and organizing files, images, and other media assets used across the platform, and as a Super Admin, you have complete control over file Management
- #### 4.14.1 Media Library Overview
View and manage all media files through the centralized media library interface.
Page Actions:
- Click “New Folder” to create a new folder for organizing media files.
- You can create multiple folders, and upload each specific file to create a folder, but all file data you can see under all files.
- Click “Upload Files” to upload new media files to the library.
Breadcrumb Navigation:
The breadcrumb displays the current location within the media library hierarchy, starting with the Media Library home icon.
Search And Media Statistics:
- Enter keywords in the search field to find specific media files.
- View real-time statistics displayed at the top:
- Files: Total number of files in the current location
- Bytes: Total storage space used
- Images: Total number of image files
File Action:
- When you click the folder, you’ll see the list of particular files and use available actions such as:
- Download: use this button to export the media file
- View info: clicking this, you’ll see the full information about the file
- Copy link: Use this button to copy the link of the file
- You can remove the file by clicking the delete button.
4.15 Add-Ons Manager
Managing Add-Ons is essential for extending platform functionality with additional Add-Ons and features, and as a Super Admin, you have complete control over Add-On installation, activation, and configuration:
- #### 4.15.1 Add-Ons Manager Overview
View and manage all available Add-Ons through the centralized Add-Ons management interface.
Page Actions:
- Click the add button (+) to access Add-On installation options.
- Use the search bar to find a specific Add-On.
Add-Ons Grid Display:
The Add-Ons are displayed in a card-based grid layout. Each Add-On card includes:
- Icon: Visual representation of the Add-On
- Version: Current version number (e.g., v5.0)
- Status Badge: Current activation status (Active or Inactive)
- Add-On Name: Title of the Add-On module
- Description: Brief description or dependency information for some Add-Ons
- Action Buttons:
- Details button to view Add-On information
- Two buttons are available to enable or disable the Add-On.
Available Add-Ons:
Mewayz (Formerly Seemless) has over 300+ add-ons, but only the ones that are set up will be displayed here.
- #### 4.15.2 Upload Add-Ons
Install new Add-Ons by uploading ZIP files to the platform. When you buy the Add-On from mewayz.com , they provide you with the ZIP file.
Upload Interface:
The upload page provides a drag-and-drop area for Add-On installation:
- Upload Area: Drag and drop ZIP files or click to browse
- Upload Icon: Visual indicator for file upload
- Instructions: “Select ZIP files to upload.”
- Support Note: “Support for multiple ZIP files.”
- Choose Files: Button to browse and select ZIP files from the file system
- Click “Install Add-Ons” to process and install the uploaded Add-On files.
- Click “Cancel” to discard the upload and return to the Add-Ons manager.
4.16 Settings Management
Managing system settings is essential for configuring platform-wide options, and as a Super Admin, you have complete control over all configuration settings:
- #### 4.16.1 Settings Overview
Configure platform settings through a comprehensive settings interface organized by category.
Settings Navigation:
you enable the other Add-On, it automatically appears in the settings to use; the left sidebar displays all available settings categories:
- Brand Settings
- System Settings
- Currency settings
- Cookie Settings
- Pusher Settings
- Chat GPT Settings
- Cache Settings
- Storage Settings
- SEO Settings
- Email Settings
- Email Notification Settings
- Bank Transfer Settings
- Stripe Settings
- PayPal Settings
- #### 4.16.2 Brand Settings
Configure the platform’s visual branding elements.
Logos Tab
Upload and manage logo files for different display modes.
Logo (Light Mode):
- Recommended Size: 100px × 30px
- The current file displays in the preview box
- Enter the filename in the text field or click “Browse” to select a new logo file
- Click the “X” button to remove the current logo
- Preview displays the uploaded logo for the light theme
Logo (Dark Mode):
- Recommended Size: 100px × 30px
- The current file displays in the preview box with a dark background
- Enter the filename in the text field or click “Browse” to select a new logo file
- Click the “X” button to remove the current logo
- Preview displays the uploaded logo for the dark theme
Favicon:
- Upload the browser favicon icon
- The current favicon displays in the preview box
- Enter the filename in the text field or click “Browse” to select a new favicon
- Click the “X” button to remove the current favicon
- Preview displays the uploaded favicon
Text Tab
Configure the application title and footer text displayed throughout the platform.
Title Text:
- Enter the application title in the text field (e.g., “Mewayz (Formerly Seemless)”)
- Description: “Application title displayed in the browser tab.”
- This text appears in the browser tab and throughout the application
Footer Text:
- Enter the footer copyright text in the text field (e.g., “Copyright (c) Mewayz (Formerly Seemless)”)
- Description: “Text displayed in the footer.”
- This text appears at the bottom of all pages
Theme Tab
Customize the visual theme, colors, sidebar appearance, layout direction, and theme mode.
Theme Color:
Select from six predefined color schemes by clicking on the color swatches:
- Blue: Blue color theme
- Green: Green color theme (default)
- Purple: Purple color theme
- Orange: Orange color theme
- Red: Red color theme
- Custom Color: enter code to color theme
Sidebar Configuration:
Sidebar Variant: Select the sidebar display style:
- Inset: Sidebar embedded within the page layout (selected by default with a checkmark)
- Floating: Sidebar appears as a floating panel
- Minimal: Compact sidebar with minimal styling
Sidebar Style: Select the sidebar visual style:
- Plain: Simple, flat sidebar design (selected by default with checkmark)
- Colored: Sidebar with color-filled background
- Gradient: Sidebar with gradient color effect
Layout Configuration:
Layout Direction: Select the text and content flow direction:
- Left-to-Right: Standard left-to-right layout (selected by default with checkmark)
- Right-to-Left: Right-to-left layout for RTL languages
Theme Mode:
Select the color scheme mode for the application:
- Light: Light color theme (selected by default with checkmark)
- Dark: Dark color theme
- System: Automatically match system theme preferences
- #### 4.16.3 System Settings
Configure core system parameters and behaviors. From the Super Admin side, when a new company is configured or created, the system setup defaults will automatically populate.
System Configuration:
- Default Language: Select the default language for the platform from the dropdown.
- Date format: Choose the date display format.
- Time format: Select 12-hour or 24-hour time format.
- Calendar start day: Select the weekdays from the dropdown menu.
- Terms & Conditions URL: Enter the URL related of term & conditions
- Display Landing Page: Toggle to enable or disable the landing page display.
- Enable Email Verification: Toggle to enable or disable managing the user verification of the email.
- Enable Landing Page: Toggle to allow accessible for the landing page.
- Registration: Enable the toggle so that new users can register an account.
- #### 4.16.4 Currency Settings
This currency setting is essential, as your selected default currency will appear in the Plan section and be displayed throughout the plan.
- Default Currency: Select your preferred currency from the dropdown list.
- Symbol Position: Choose whether the currency symbol appears before or after the amount by selecting the corresponding option.
- Thousands Separator: Select how thousands are separated (Comma or Dot) from the dropdown menu.
- Decimal Places: Choose the number of decimal places to display (e.g., 2 for 1234.56).
- Decimal Separator: Select between Dot (123.45) or Comma (123,45) as the decimal separator.
- Show Decimals: Toggle this option on or off to display or hide decimal places in amounts.
- Add Space: Enable or disable a space between the amount and the currency symbol.
- Preview: View the sample currency format at the top to see changes in real-time.
- Click the Save Changes button: to apply the configured settings.
- #### 4.16.5 Cookie Settings
Configure cookie consent and privacy settings.
Cookie Configuration:
- Enable Cookie Popup: Toggle this option to show or hide the cookie consent pop-up for visitors.
- Enable Logging: Turn this on to record cookie-related user activity for auditing and compliance purposes.
- Strictly Necessary Cookies: Enable this to allow essential cookies required for core website functionality.
- Cookie Title: Enter the title that will appear on the cookie consent pop-up.
- Cookie Description: Add a description explaining how cookies are used on the website.
- Strictly Cookie Title: Define the heading shown for strictly necessary cookies.
- Strictly Cookie Description: Provide details explaining why strictly necessary cookies are required.
- Contact Us Description: Enter the message displayed for users who want more information about the cookie policy.
- Contact Us URL: Provide the link where users can contact support or view detailed cookie information.
- Download Cookie Data: Click this option to download stored cookie-related data.
- Save Changes: Click Save Changes to apply and store all configured settings.
- #### 4.16.6 Pusher Settings
Configure real-time notification services using Pusher. This setting is used in Messenger.
Pusher Configuration:
- Pusher App ID: Enter the Pusher application ID.
- Pusher App Key: Provide the Pusher application key.
- Pusher App Secret: Enter the Pusher secret key.
- Pusher App Cluster: Specify the Pusher cluster region.
- Click “Save Changes” to apply the Pusher configuration.
- #### 4.16.7 SEO Settings
Configure search engine optimization metadata.
SEO Configuration:
- Meta Title: Enter the title that will appear as the clickable headline in search engine results.
- Meta Description: Add a brief summary of the page content that appears below the title in search results.
- Meta Keywords: Enter comma-separated keywords relevant to your website or page content.
- Meta Image: Upload an image that will be displayed when the page is shared on social media platforms.
- SEO Preview: Review how your page will appear in search engine results and on social media.
- Click Save Changes to apply and store the SEO settings.
- #### 4.16.8 Cache Settings
Manage platform cache for improved performance.
Cache Management
The cache settings display current cache statistics and provide options to clear the cache. Information includes cache types and their current status.
- Click “Clear Cache” to remove cached data and “Save Changes” to apply settings.
- #### 4.16.9 Storage Settings
Configure file storage options for the platform. In this setting, you need to set up the local storage, AWS S3, and Wasabi according to your storage setup.
Storage Configuration:
- Storage Type: Select a storage provider from the dropdown options.
- Additional configuration fields appear based on the selected storage type.
- Click “Save Changes” to apply the storage settings.
- #### 4.16.10 Email Settings
Configure email sending capabilities for the platform.
Email Configuration:
- Email Provider: Select your email service provider from the dropdown menu.
- Mail Driver: Enter the mail driver protocol (e.g., smtp).
- SMTP Host: Input your SMTP server address (e.g., smtp.example.com).
- SMTP Port: Specify the port number for your SMTP connection (e.g., 587).
- SMTP Username: Enter your email account username or email address.
- SMTP Password: Provide your SMTP account password.
- Mail Encryption: Choose the encryption method (TLS, SSL, or None).
- From Address: Set the default sender email address for outgoing emails.
- Test Email Configuration: Enter a recipient email and click Send Test Email to verify settings.
- Click “Save Changes” to apply your email configuration.
- #### 4.16.11 Email Notification Settings
Configure which email notifications are sent to users. When you enable an Add-On from the Add-On Manager, you will receive email notifications only for the Add-Ons that are enabled.
Notification Toggle:
- Email Notification: Master toggle to enable or disable all email notifications.
- #### 4.16.12 Bank Transfer Settings
Configure bank account information for receiving payments.
Bank Configuration:
The bank transfer settings allow configuration of bank account details for payment processing. Fields include bank information and account details.
After entering all the details, you enable the toggle, and you will see the bank transfer details in the Subscription page.
- Click “Save Changes” to apply the bank transfer settings.
- #### 4.16.16 Stripe Settings
Configure Stripe payment gateway integration.
Important note: Make sure this Add-On is enabled from the Add-On Manager page. And if it is enabled, then you’ll see the subscription page.
Stripe Configuration:
Settings for integrating Stripe as a payment processing option, including API keys and configuration.
- Click “Save Changes” to apply the Stripe settings.
- #### 4.16.17 PayPal Settings
Configure PayPal payment gateway integration.
Important note: Make sure this Add-On is enabled from the Add-On Manager page. And if it is enabled, then you’ll see the subscription page.
PayPal Configuration:
Settings for integrating PayPal as a payment processing option, including API credentials and configuration.
- Click “Save Changes” to apply the PayPal settings.
5. Admin Login Process
5.1 Access Mewayz (Formerly Seemless)
Go to the Mewayz (Formerly Seemless) website and enter your admin login credentials.
Admin Credentials :
You’ll need a username and password provided by the system administrator.
Log In :
Click the “Log In” button to access your admin dashboard.
6. Subscription Management
Managing your subscription plan is essential for accessing platform features and Add-Ons, and as a Company Admin, you have complete control over plan selection, customization, and payment processing:
6.1 Subscription Setting Overview
View and manage your subscription plans through the centralized subscription interface.
- #### 6.1.1 Subscription Type Tabs:
Navigate between different subscription models using the tab options:
- Pre Package Subscription: Fixed plans with predefined features and pricing
- Usage Subscription: Customizable plans based on usage metrics (users, storage, Add-Ons)
- Monthly: Monthly billing cycle view
- Yearly: Annual billing cycle view
6.2 Pre Package Subscription Plans
Select from predefined subscription plans that offer different features and capabilities tailored to your business needs.
- #### 6.2.1 Subscription Plans Display:
The platform displays available subscription plans in a card-based layout. Each plan card includes:
- Plan Name: Title of the subscription trial
- Plan Description: Brief explanation of the target audience
- Pricing: Cost displayed prominently with billing frequency
- Plan Badge: Special labels (e.g., “Most Popular”) to highlight featured plans
- User Limit: Maximum number of users allowed
- Storage Allocation: Storage capacity included in the plan
- Trial Period: Duration of the trial period available
- Add-Ons Status: Shows the number of enabled Add-Ons (e.g., 7/8 Enabled)
6.3 Usage Subscription (Custom Plan)
Build a customized subscription plan tailored to your specific business requirements with flexible pricing based on actual usage.
- #### 6.3.1 Plan Details:
View your current plan information and limitations:
- Users: Displays user limit (e.g., “Unlimited users”)
- Storage: Shows available storage capacity (e.g., “47.7 GB”)
- Plan Expire Date: Expiration date of the current plan (format: YYYY-MM-DD)
Subscribe To Plan
Enables users to review the subscription summary and complete the subscription process:
- Coupon Code: Input field to enter and apply a coupon code.
- Subscription Summary: Displays selected plan information:
- Users: 50
- Storage: 0 GB
- Free Trial: 14 days
- Subscribe Button: Button labeled “Subscribe to Plan – 25.00$” to initiate the subscription.
7. Bank Transfer Request Management
Managing bank transfer requests is essential for processing subscription payments, and as a Company Admin, you have complete visibility into your payment requests and their approval status:
7.1 Bank Transfer Requests List Page
View and manage all bank transfer requests through the centralized request management interface.
Search and Display Options:
- Enter order numbers in the search bar to find specific transfer requests.
- Click the “Filters” button to access advanced filtering options.
Filter Options:
The filtering system allows you to narrow down transfer requests based on specific criteria:
- Status: Select from the dropdown to filter requests by their current status (Approved, Rejected, Pending).
- User Name: Enter the user name to filter requests by specific users or companies.
- Use “Apply” to activate filters or “Clear” to reset all filters.
Request Table Information:
The bank transfer request table displays the following columns:
- Order Number: Unique alphanumeric identifier for each transfer request with sort functionality.
- User: Company or user name with associated email address.
- Plan: Subscription plan type (Custom Plan, Free Plan, Starter Plan).
- Amount: Transfer amount displayed in currency format.
- Status: Current request status with color-coded badges:
- Approved: Green badge indicating successful approval
- Rejected: Red badge indicating declined request
- Pending: Yellow badge indicating awaiting approval
- Date: Date when the request was submitted (format: YYYY-MM-DD) with sort functionality.
- Actions: Quick action buttons for request management.
Each request row includes action icons that vary based on the request status:
- View: Eye icon to display the request details in read-only mode (available for all requests).
- Delete: Red trash icon to remove the request from the system (available only for Pending requests).
Note: Approved and Rejected requests can only be viewed, while Pending requests can be viewed or deleted.
8. Order Management
Managing orders is essential for tracking subscription purchases and payments, and as a Company Admin, you have full visibility into all your platform transactions:
8.1 Orders List Page
View and manage all orders through the centralized order management interface.
Search and Display Options:
- Use the search bar to find specific orders.
- Click the “Search” button to execute the search.
Order Table Information:
The order table displays the following columns:
- Order ID: Unique alphanumeric identifier for each order with sort functionality.
- Plan: Subscription plan purchased (Custom Plan, Free Plan, Professional Plan, Starter Plan).
- Coupon: Applied coupon code (e.g., HXIZ5, REF09) or dash (-) if no coupon was used.
- Amount: Order amount displayed in currency format.
- Status: Current order status with color-coded badge:
- Succeeded: Green badge indicating successful payment and order completion
- Payment Method: Payment gateway used for the transaction:
- Bank Transfer: Payment processed via bank transfer
- Paypal: Payment processed through PayPal
- Stripe: Payment processed through Stripe
- Displays dash (-) for free plans with no payment required
- Date: Date when the order was placed (format: YYYY-MM-DD) with sort functionality.
9. Settings Management
Managing system settings is essential for configuring platform-wide options, and as a Company Admin, you have complete control over branding, system preferences, company information, currency, email, and payment gateway settings:
9.1 Settings Overview
Configure platform settings through a comprehensive settings interface organized by category. The settings available at the Super Admin level are the same on the Company side; however, they will appear in the Company settings only after the corresponding Add-On is activated from your current plan.
9.2 Company Settings
Configure company information displayed across the platform.
Company Information:
- Company Name: Enter the official company name.
- Company Address: Provide the complete company address.
- City: Specify the city location.
- State: Enter the state or province.
- Country: Select the country from the dropdown.
- Zip Code: Provide the postal code.
- Telephone: Enter the company phone number.
- Company Email: Provide the company contact email address.
- Email From Name: Enter the sender name for outgoing emails.
- Tax Number: Enter the tax number or VAT registration number if applicable.
- Registration Number: Provide the company registration number.
- Click “Save Changes”: to apply the company information updates.
10 Admin Mewayz (Formerly Seemless)board
As a Company Admin in Mewayz (Formerly Seemless), you have access to multiple specialized dashboards based on your activated Add-Ons. These complimentary dashboards are included with your subscription plan and provide comprehensive management tools for different business functions.
10.1 Dashboard Menu
Access different dashboard Add-Ons through the Mewayz (Formerly Seemless)board menu in the left sidebar.
Available complementary Dashboards:
Click on the Mewayz (Formerly Seemless)board menu item to reveal the dropdown list of available complimentary dashboard types:
Project Dashboard:
- The Project Dashboard provides comprehensive project management insights, including total projects, task completion rates, active bugs, team members, and client information.
- It displays visual analytics for project status, task priorities, team performance metrics, and recent company tasks across all projects.
Account Dashboard:
- The Account Dashboard offers a complete financial overview, displaying client and vendor management with payment tracking for both incoming and outgoing transactions.
- It features monthly payment trends through visual charts and provides detailed lists of recent revenue and expense transactions for comprehensive accounting management.
HRM Dashboard:
- The HRM Dashboard delivers complete human resource management insights, including employee attendance, leave management, department distribution, and branch information.
- It features an integrated calendar for events and holidays, quick action shortcuts for HR tasks, and displays recent leave applications and company announcements.
POS Dashboard:
- The POS Dashboard provides real-time point of sale analytics, including daily revenue, total sales count, average transaction value, and product inventory tracking.
- It displays sales performance trends over the last 10 days, alerts for out-of-stock products, showcases top-selling items, and lists recent transaction details.
CRM Dashboard:
- The CRM Dashboard offers comprehensive customer relationship management insights, displaying total deals, leads, users, and clients with interactive data visualization.
- It features a lead tasks calendar, deal and lead call tracking by day, pipeline stage analysis, and lists recently created deals and leads for effective sales management.
11. Role Management
Managing user roles is essential for controlling access permissions and user capabilities, and as a Company Admin, you have complete control over creating, editing, and assigning roles to users:
11.1 Roles List Page
View and manage all user roles through the centralized role management interface.
Search and Display Options:
- Enter keywords in the search bar to find specific roles.
- Click the “Search” button to execute the search.
- Switch between list view and grid view using the toggle buttons.
Role Table Information:
The role table displays the following columns:
- Name: Role identifier (e.g., staff, client, vendor, farmer, parent).
- Label: Descriptive role name displayed to users (e.g., Staff, Client, Vendor).
- Permissions: Number of permissions assigned to the role displayed in a badge (e.g., 110, 79, 59).
- Users: List of users assigned to this role displayed as name badges.
- Actions: Edit icon to modify role settings and permissions.
11.2 Create New Role
Add new user roles to the platform through the Create New Role.
Page Actions:
Click the “Create” button in the top right corner to create a new role.
Role Information:
- Name: Enter the role identifier.
- Label: Enter the role display name.
Add-On Tabs:
Use the Search Add-Ons field to quickly find a specific module.
Navigate through the tabs to manage permissions for different Add-On modules. In this tab, only the Enable Add-Ons is displayed.
Permissions:
Select permissions for the role by checking the appropriate checkboxes. Permissions are organized by category.
The permission structure varies based on the selected Add-On tab, providing granular control over user capabilities within each Add-On.
- Click “Create” to save the new role with assigned permissions.
- Click “Cancel” to discard changes and return to the roles list page.
12. User Management
Managing users is essential for controlling platform access and team collaboration, and as a Company Admin, you have complete control over creating, editing, and managing user accounts:
- Page Actions: Use the refresh icon to reload the user list, click Create to add a new user account, use the search bar and click Search to find specific users, switch between list view and grid view using the toggle buttons, and click Filters to open advanced filtering options.
- Filter Options: Filter users by Email, Role (e.g., Staff, Student), and Login Status (Enabled/Disabled), then click Apply to activate the filters or Clear to reset them.
- User Table Information: The table displays Avatar, Name, Email, Mobile No, Role, Login Status, and Actions.
- Action Options: Each user record includes options to Login as User (view the user’s perspective), Change Password (enter current and new password), Edit user details, and Delete the user from the system.
13. Our Complimentary Add-Ons
Mewayz (Formerly Seemless) provides complimentary Add-Ons based on your subscription plan. As a Company Admin, you have access to multiple business management Add-Ons through the sidebar navigation menu.
13.1 Complimentary Add-Ons
Access various business management Add-Ons through the sidebar navigation menu. Each Add-On includes a dropdown menu for accessing specific features within that module.
- #### 13.1.1 Product & Service:
The Product & Service Add-On enables comprehensive catalog management for products and services with support for SKU tracking, pricing configuration, inventory quantities, and product categorization. It includes system setup tools for managing categories, tax rates, and measurement units to streamline product organization and sales operations.
13.1.2 Project:
The Project Add-On delivers comprehensive project management capabilities, including project creation with budget allocation, team assignment, timeline tracking, and status monitoring across multiple projects. It includes detailed project reporting with task completion metrics, bug tracking, milestone progress, and customizable system setup for configuring task stages and bug stages with color-coded workflows.
13.1.3 Accounting:
The Accounting Add-On provides comprehensive financial management tools for managing customers, vendors, banking operations, the chart of accounts, and payment processing for both vendor and customer transactions. It includes revenue and expense tracking, debit and credit note management, financial reporting capabilities, and system setup options for configuring accounting workflows and preferences.
13.1.4 HRM:
The HRM Add-On provides complete human resource management with employee records, payslip generation, attendance tracking, and leave management systems. It includes comprehensive HR operations such as awards, promotions, resignations, terminations, warnings, complaints, transfers, document management, acknowledgments, announcements, events scheduling, and configurable system setup for streamlined workforce administration.
13.1.5 POS:
The POS Add-On enables comprehensive point-of-sale operations with product catalog management across multiple categories, customer selection, warehouse location tracking, and shopping cart functionality with SKU-based search. It includes order management with detailed tracking, barcode generation, and printing capabilities for inventory management, and advanced reporting features covering sales analytics (daily, monthly, warehouse-wise), product performance with revenue analysis and quantity distribution, and customer insights, including spending patterns and order distribution metrics.
13.1.6 CRM:
The CRM Add-On delivers comprehensive customer relationship management with lead tracking, including name, subject, stage progression, task management, follow-up scheduling, user assignment, and pipeline-based organization. It provides deal management with pricing, pipeline categorization, stage-based workflows, and task tracking, along with advanced reporting capabilities including Lead Reports (weekly lead conversions, sources conversion analysis, per month lead trends with general, staff, and pipeline views) and Deal Reports (weekly deal status tracking, deal sources conversion metrics, per month deal analysis with general, staff, client, and pipeline reporting options), plus extensive system setup capabilities for configuring custom pipelines, lead stages, deal stages, customizable labels, and multiple lead sources.
14. Proposal Management
Managing sales proposals is essential for creating and tracking business quotations, and as a Company Admin, you have complete control over proposal creation, editing, and monitoring:
14.1 Proposals List Page
The Proposals List page allows you to view and manage all sales proposals from a centralized interface.
- Page Actions & Search: Click Create to add a new proposal, enter keywords in the search bar and click Search, switch between list and grid views using the toggle buttons, and click Filters to open advanced filtering options.
- Filter Options: Filter proposals by Customer (dropdown, default: All Customers), Date Range (calendar selector), and Status (dropdown, default: All Status), then click Apply to activate filters or Clear to reset them.
- Proposal Table Information: The table displays Proposal Number, Customer, Proposal Date, Due Date, and overdue, shown in red with “Overdue” label. Subtotal, Tax, Total Amount, Balance, Status, and Actions.
- Action option: Each proposal includes options to Download, Send Proposal (email to customer), View (read-only), Edit, and Delete.
14.2 Create Sales Proposal
Use the Create Sales Proposal from to add new proposals.
- Sales Proposal Details: Select Proposal Date (defaults to current date) and Due Date using date pickers, choose Customer and Warehouse from dropdowns, enter Payment Terms, and add Notes.
- Sales Proposal Items: Click Add Item to add products or services, select Product, enter Qty (default 1), Unit Price, Discount % (if any), view Tax (e.g., No tax), and see the auto-calculated Total; remove items using the red trash icon.
- Proposal Summary: The right panel shows real-time Subtotal, Discount (negative value), Tax, and Total, while the bottom left displays the number of items added.
- From Actions: Click Create to save and generate the proposal or Cancel to discard changes and return to the list page.
15. Sales Invoices Management
Managing sales invoices is essential for tracking customer transactions and purchases, and as a Company Admin, you have complete control over invoice creation, editing, and monitoring:
15.1 Sales Invoices List Page
The Sales Invoices List page allows you to view and manage all sales invoices from a centralized interface.
- Page Actions & Search: Click Create to add a new sales invoice, enter an invoice number in the search bar and click Search, switch between list and grid views using the toggle buttons, and click Filters to access advanced filtering options.
- Filter Options: Filter invoices by Customer, Warehouse, Status (Draft, Posted), and Date Range, then click Apply to activate filters or Clear to reset them.
- Invoice Table Information: The table displays Invoice Number, Customer, Invoice Date, Due Date, Subtotal, Tax, Total Amount, Balance, Status, and Actions.
Action option:
- Draft Invoices: Download PDF, View (read-only), Post Invoice (finalize & create journal entries), Edit, Delete.
- Posted Invoices: Download, View (read-only).
15.2 Create Sales Invoice
Use the Create Sales Invoice from to add new invoices.
- Invoice Type Selection: Choose Product Wise (with quantity tracking) or Service Wise (without quantity tracking).
- Sales Invoice Details (Product Wise): Select Invoice Date (default: current date) and Due Date, choose Customer and Warehouse, and enter Payment Terms and Notes.
- Sales Invoice Items (Product Wise): Click Add Item, select Product, enter Qty (default 1), Unit Price, Discount %, view Tax, and see the auto-calculated Total; remove items using the red trash icon. The bottom left shows the item count.
- Sales Invoice Details (Service Wise): Select Invoice Date and Due Date, choose Customer, enter Payment Terms and Notes (Warehouse not required).
- Sales Invoice Items (Service Wise): Click Add Item, select Service, enter Unit Price and Discount %, view Tax, and see the auto-calculated Total; remove items using the red trash icon (no Qty field).
- Invoice Summary: The right panel shows real-time Subtotal, Discount (negative, red), Tax, and Total (bold).
- From Actions: Click Create to save and generate the invoice or Cancel to discard changes and return to the list page.
16. Sales Return Management
Managing sales returns is essential for processing customer returns and maintaining accurate inventory records, and as a Company Admin, you have complete control over return creation, tracking, and processing:
16.1 Sales Returns List Page
The Sales Returns List page allows you to view and manage all sales returns from a centralized interface.
- Page Actions & Search: Click Create to add a new sales return, use the search bar to find specific return invoices, switch between list and grid views using the toggle buttons, and click Filters to open advanced filtering options.
- Filter Options: Filter returns by Customer, Warehouse, Status (Draft, Posted), and Date Range (calendar selector), then click Apply to activate filters or Clear to reset them.
- Return Table Information: The table displays Return Number, Customer, Warehouse, Return Date, Total Amount, Items (returned products with quantities), Status, and Actions.
- Action option: Each return includes options to Approve (status automatically changes to Approved), View (read-only), and Delete.
16.2 Create Sales Return
Use the Create Sales Return from to process customer returns.
- Sales Return Details: Select Return Date (default: current date), choose the Original Invoice (Invoice Number – Customer Name), select Warehouse, choose a Return Reason (e.g., Wrong Item), and enter Notes.
- Available Items from Invoice: View invoice items with Product (SKU), Available Qty, Unit Price, Discount, Tax (percentage badges), and Total, and click the purple Added button to include items in the return.
- Return Items: Configure return items by entering Return Qty, viewing Unit Price (non-editable), Discount, Tax, auto-calculated Total, optionally adding an item-level Reason, and removing items using the red trash icon.
- Return Summary: The right panel shows real-time Subtotal, Tax, and Total Return Amount (bold), while the bottom left displays the number of items selected for return.
- From Actions: Click Create to save and generate the sales return or Cancel to discard changes and return to the list page.
17. Purchase Invoice Management
Managing purchase invoices is essential for tracking vendor transactions and procurement expenses, and as a Company Admin, you have complete control over purchase invoice creation, editing, and monitoring:
17.1 Purchase Invoices List Page
The Purchase Invoices List page allows you to view and manage all purchase invoices from a centralized interface.
- Page Actions & Search:Click Create to add a new purchase invoice, use the search bar to find invoices by invoice number, switch between list and grid views using the toggle buttons, and click Filters to open advanced filtering options.
- Filter Options:Filter invoices by Vendor, Warehouse, Status (Draft, Posted), and Date Range (calendar selector), then click Apply to activate filters or Clear to reset them.
- Invoice Table Information:The table displays Invoice Number, Vendor, Invoice Date, Due Date (overdue dates shown in red with an Overdue label), Subtotal, Tax, Total Amount, Balance, Status, and Actions.Sortable columns include Invoice Number, Invoice Date, Due Date, Subtotal, Tax, Total Amount, and Balance.
- Action Options:
- Draft invoices include options to Download, View (read-only), Post Invoice, Edit, and Delete.
- Posted invoices include options to Download and View (read-only).
17.2 Create Purchase Invoice
Use the Create Purchase Invoice from to add new purchase invoices to the system.
- Purchase Invoice Details:Select Invoice Date (default: current date), Due Date, Vendor, Warehouse, enter Payment Terms (e.g., Net 30), and add optional Notes.
- Purchase Invoice Items:Click Add Item to add products to the invoice.
- Item Configuration:Each item includes Product, Qty (default: 1), Unit Price, Discount %, Tax (e.g., No tax), auto-calculated Total, and an option to remove the item.
- Invoice Summary:The right panel shows real-time Subtotal, Discount (negative value), Tax, and Total (bold).
- From Actions:Click Create to save and generate the purchase invoice or Cancel to discard changes and return to the invoices list page.
18. Purchase Return Management
Managing purchase returns is essential for processing returns to vendors and maintaining accurate inventory records, and as a Company Admin, you have complete control over return creation, tracking, and processing.
18.1 Purchase Returns List Page
The Purchase Returns List page allows you to view and manage all purchase returns from a centralized interface.
- Page Actions & Search: Click Create to add a new purchase return, use the search bar to find returns by return number, switch between list and grid views using the toggle buttons, and click Filters to open advanced filtering options.
- Filter Options: Filter returns by Vendor, Warehouse, Status (Draft, Approved), and Date Range (calendar selector), then click Apply to activate filters or Clear to reset them.
- Return Table Information: The table displays Return Number, Vendor, Warehouse, Return Date, Total Amount, Items (product × quantity), Status, and Actions. Sortable columns include Return Number, Return Date, and Total Amount. Status badges: Draft (unpublished), Approved (processed).
- Action Options:
- Draft returns: Approve, View (read-only), Delete
- Approved returns: Checkmark indicates approved
18.2 Create Purchase Return
Use the Create Purchase Return from to process returns to vendors.
- Purchase Return Details: Select Return Date (default: current date), Original Invoice (Invoice Number – Vendor Name), Warehouse, choose Return Reason (e.g., Wrong Item), and add optional Notes.
- Available Items from Invoice: View all items from the selected invoice available for return.
- Item Display:
- Product (name + SKU)
- Available Qty (shows “0 – No items available for return” if none)
- Unit Price
- Discount (dash if none)
- Tax (percentage badges, e.g., VAT 12%)
- Total (including tax)
- Action: Click Add to Return to include the item
- Item Counter: The bottom left displays the number of items selected (e.g., “0 items selected for return”).
- From Actions: Click Create to save and generate the purchase return or Cancel to discard changes and return to the returns list page.
19. Warehouse Management
Managing warehouses is essential for organizing inventory storage locations and distribution centers, and as a Company Admin, you have complete control over warehouse creation, configuration, and monitoring:
19.1 Warehouses List Page
The Warehouses List page allows you to view and manage all warehouse locations from a centralized interface.
- Page Actions & Search: Click Create to add a new warehouse, use the search bar to find warehouses, switch between list and grid views using the toggle buttons, and click Filters to open advanced filtering options.
- Filter Options: Filter warehouses by City and Status (Active, Inactive), then click Apply to activate filters or Clear to reset them.
- Warehouse Table Information: The table displays Name, Address, City, Zip Code, Phone, Status, and Actions. Sortable columns include Name, City, and Status.
- Action Options: Each warehouse includes options to edit warehouse details or delete the warehouse from the system.
19.2 Create Warehouse
Use the Create Warehouse from to add new warehouse locations to the system.
- Warehouse Details: Enter Name, Address, City, Zip Code, Phone, Email, and select Status (default: Active).
- From Actions: Click Create to save the warehouse or Cancel to discard changes and return to the warehouses list page.
20. Transfer Management
Managing warehouse transfers is essential for moving inventory between storage locations and distribution centers, and as a Company Admin, you have complete control over transfer creation, tracking, and processing:
20.1 Transfers List Page
The Transfers List page allows you to view and manage all warehouse transfers from a centralized interface.
- Page Actions & Search: Click Create to add a new warehouse transfer, use the search bar to find transfers, and click Filters to open advanced filtering options.
- Filter Options: Filter transfers by From Warehouse, then click Apply to activate filters or Clear to reset them.
- Transfer Table Information: The table displays Product, From Warehouse, To Warehouse, Quantity, Date, and Actions.
- Action Options: Each transfer includes an option to delete the transfer from the system.
20.2 Create Transfer
Use the Create Transfer from to move inventory between warehouse locations.
- Transfer Configuration: Select From Warehouse (source). To Warehouse and Product remain disabled with “Select from warehouse first” until a source warehouse is selected. Enter Quantity (enabled after product selection, otherwise shows “Select product first”). Select Date using the date picker (default: current date).
- From Actions: Click Create to save and process the transfer or Cancel to discard changes and close the form.
21. Media Library Management
Managing the media library is essential for storing and organizing files, images, and other media assets used across the platform, and as a Company Admin, you have complete control over file management. The media library management available at the Super Admin level is the same on the Company side.
22. Messenger
The Messenger provides real-time internal communication capabilities, and as a Company Admin, you have access to chat with all users within your organization:
22.1 Messenger Overview
View and manage conversations through the centralized messaging interface. You can chat internally with the company user.
Conversations Panel:
The left panel displays all available conversations and user lists.
- Enter keywords in the search field to find specific users quickly.
View Tabs:
Navigate between different conversation views using the tab options:
- All Users: Displays all users available for messaging (selected by default).
- Favorites: Shows favorited or pinned conversations for quick access.
Conversation List:
The conversation list displays all recent chats with the following information:
- Avatar: User profile picture or default avatar icon with online status indicator.
- User Name: Full name of the user.
- Last Message Preview: Truncated preview of the most recent message in the conversation.
- Timestamp: Time of the last message
- Online Status: Green dot indicator showing users who are currently online.
- Quick Actions: Pin and star icons for managing favorite conversations (visible on hover or for selected conversations).
- Click on any user from the conversation list to open the chat and start messaging.
23. Helpdesk Management
Managing support tickets is essential for addressing user concerns and providing technical assistance, and as a Company Admin, you have complete control over ticket creation, tracking, and resolution:
23.1 Support Tickets List Page
The Support Tickets List page allows you to view and manage all support tickets from a centralized helpdesk interface.
- Page Actions & Search: Click Create to add a new support ticket, use the search bar and click Search to find tickets, switch between list and grid views, adjust tickets per page using the dropdown, and click Filters to open advanced filtering options.
- Filter Options: Filter tickets by Status (in progress, closed, resolved, open), Priority (urgent, high, medium, low), and Category (e.g., Technical Support), then click Apply to activate filters or Clear to reset them.
- Ticket Table Information: The table displays Ticket ID, Title, Category, Status, Priority, Created By, and Actions.
- Status badges: in progress (Yellow), closed (Gray), resolved (Green), open (Blue)
- Priority badges: urgent (Red), high (Orange), medium (Yellow), low (Green)
- Action Options: Each ticket includes options to View (read-only) and Edit ticket details and status.
23.2 Create Support Ticket
Use the Create Support Ticket form to add new tickets to the system.
- Required Fields: Enter Title, Description, select Category, and Priority (Low, Medium, High, Urgent; default: Medium).
- From Actions: Click Create to submit the ticket or Cancel to discard changes and close the form.
Take your business to the next level with great website!
Feel Free To Reach Out to Discuss Your Next Web Development Project.
First Name *
Last Name
Email Address *
Phone Number
More Details