Financial Goal Integration in Mewayz
Our Financial Goal feature is designed to help you set, track, and achieve your financial and business objectives with ease.
Introduction
Financial Goal is a goal-setting and tracking Add-On designed to help you define, monitor, and achieve financial objectives across savings, debt reduction, and expense management. The Add-On automatically tracks progress through account linkage, calculates projections based on contribution patterns, and provides real-time insights to keep you on target. Core features include goal categorization, milestone tracking, automatic contribution recording from journal entries, intelligent progress monitoring, and comprehensive reporting with status indicators showing whether you’re ahead, on track, behind, or critical.
Note: The Goal Add-On will be visible only if the Accounting Add-On is enabled. If the Accounting Add-On is not enabled, the Goal Add-On will not be shown.
How To Install The Add-On?
To Set Up the Financial Goal Add-On, you can follow this link: Setup Add-On.
How to Use the Financial Goal Add-On?
Managing Categories
- To create a new category, click the “Create” button at the top-right corner of the Manage
- The list page shows all categories in a table with columns for Category Name, Category Code,
- Available actions in the Actions column include: edit to modify category details, and delete to
Categories page. Enter the category name, and enter the category code. Add a description to explain the category’s purpose. Use the Is Active toggle switch to set the category status (enabled by default).
Description, Is Active, and Actions. Use the Search bar to find specific categories, and apply filters using the Is Active dropdown to show active or inactive categories. Click Apply to activate filters or Clear to remove them.
remove the category permanently.
Manage Goals
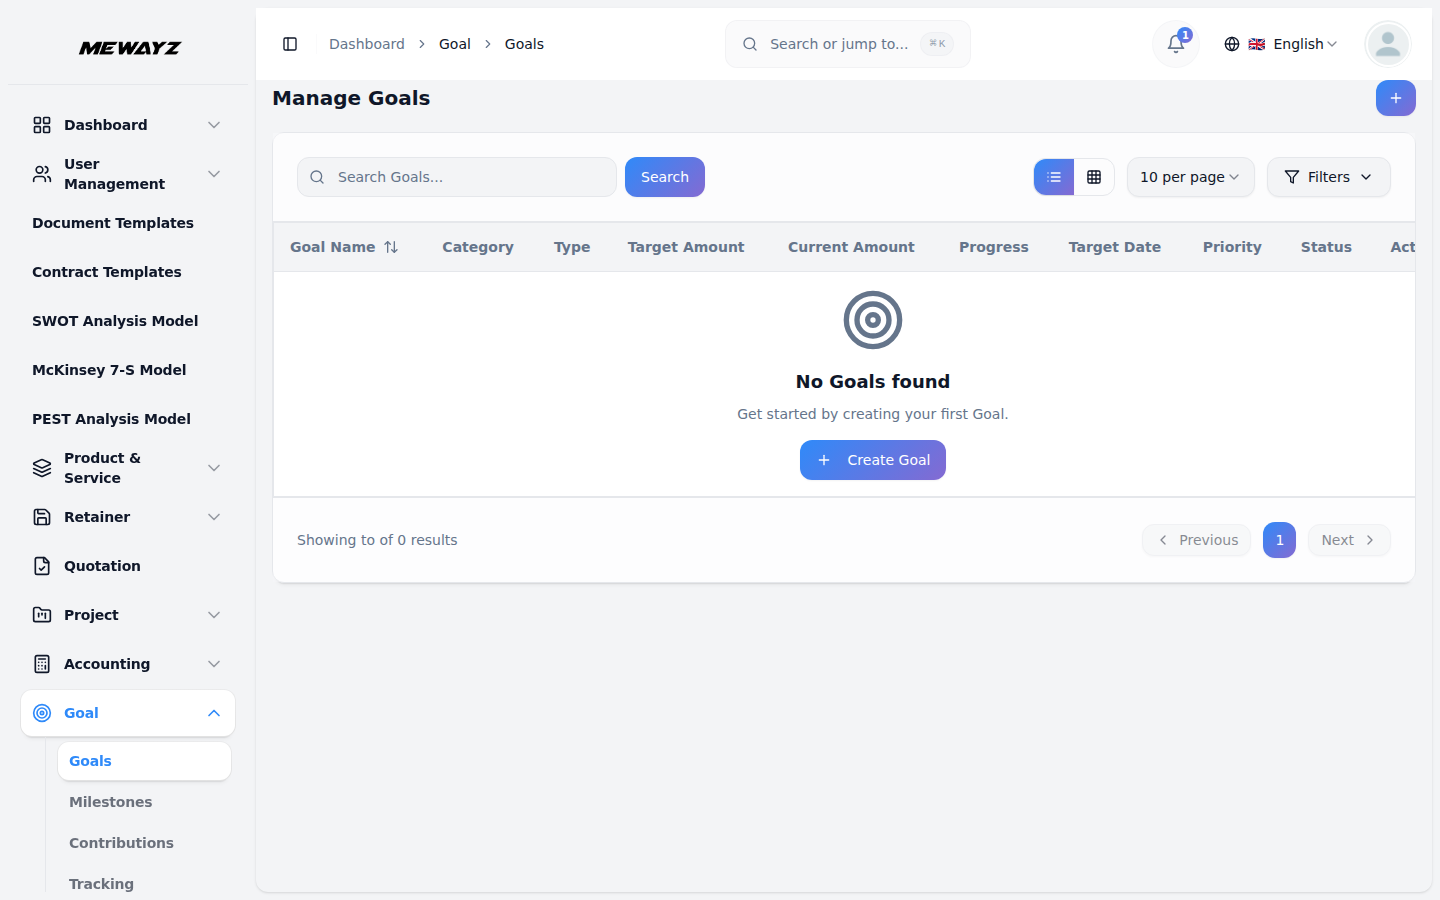
- To create a new goal, click the “Create” button at the top-right corner of the Manage Goals
- Set the start date and target date. Select a category from the dropdown (which comes from the
- The list page shows all goals in a table with columns for Goal Name, Category, Type, Target
- The Progress column displays a visual progress bar with a percentage calculated as (Current
- Priority levels are displayed with color-coded labels: Critical, High, Medium, and Low.
page. Enter the goal name, select the goal type from the dropdown (Savings, Debt Reduction, or Expense Reduction), and enter the target amount.
category section), set the priority level (Low, Medium, High, or Critical – defaults to Medium), choose a Chart of Accounts from the dropdown (which is generated in the account Add-On), and add a description. The goal is initially saved as Draft status.
Amount, Current Amount, Progress, Target Date, Priority, Status, and Actions. Available grid/list view options. Use the Search field to find specific goals, and apply filters using the dropdown menus (Goal Type, Status, Priority, and Category). Click Apply to activate filters or Clear to remove them.
Amount ÷ Target Amount) × 100. Update the current amount by editing the goal to keep progress tracking accurate.
Manage Milestones
- To create a new milestone, click the “Create” button at the top-right corner of the Manage
- The milestone is initially saved as Pending status. When the current amount in the goal is
- The list page shows all milestones in a table with columns for Goal, Milestone Name, Target
- Available actions in the Actions column include edit to modify milestone details, delete to
Milestones page. Select a goal from the dropdown (which comes from the goal section), enter the milestone name, and enter the target amount. Set the target date, and add a description.
reached, you will automatically update the status Achieved in the milestone.
Amount, Achieved Amount, Achieved Date, Target Date, Status, and Actions. Use the Search bar to find specific milestones, and apply filters using the Goal dropdown, Status dropdown, and Target Date. Click Apply to activate filters or Clear to remove them.
remove the milestone permanently.
Manage Contributions
- To create a new contribution, click the “Create” button at the top-right corner of the Manage
- The list page shows all contributions in a table with columns for Goal, Date, Amount, Type,
- All entries are created from the General section and can appear in the Goal section in two ways.
- Available actions you can use are edit to modify contribution details and delete to remove the
- Each contribution automatically updates the current amount of its associated goal, helping track
Contributions page. Select a goal from the dropdown (which comes from the goal section), set the date, and enter the amount. At last, add notes.
Notes, and Actions. Use the Search bar to find specific contributions, and apply filters using the Goal dropdown, Type dropdown, and Date Range date picker. Click Apply to activate filters or Clear to remove them. Toggle between list view and grid view using the view buttons.
When an entry is added directly in the Goal section, it is called a Manual Entry. When an entry is added in the General section, it automatically appears in the Goal section, and this is called an Automatic Entry.
details.
progress toward the target. The Notes column provides additional context for each contribution entry.
Managing Tracking
- To create a new tracking entry, click the “Create” button at the top-right corner of the Manage
- Enter the progress percentage and days remaining. Set a projected completion date and select a
- The list page shows all tracking entries in a table with columns for Goal, Date, Contribution,
- Available actions in the Actions column include: View to tracking entry details, edit to modify
- The Progress column shows the completion percentage, Days Left indicates the time remaining
Tracking page. Select a goal from the dropdown (which comes from the goal section), set the tracking date, and enter the previous amount, contribution amount, and current amount.
status from the dropdown (on track, behind, critical).
Current Amount, Progress, Days Left, Status, and Actions. Use the Search bar to find specific tracking entries, and apply filters using the Goal dropdown, Status dropdown, and Date Range. Click Apply to activate filters or Clear to remove them. Toggle between list view and grid view using the view buttons.
tracking details, and delete to remove tracking entry permanently.
until the target date, and Current Amount reflects the total accumulated toward the goal. Tracking entries helps monitor goal performance and identify which goals need attention.